A beautiful 3D scene needs more than detailed models. It needs light, materials, shadows, and careful rendering.
The rendering engine turns a scene into a finished image or animation. But different engines solve different problems. Some focus on photorealism, while others favor speed and quick feedback.
The right choice depends on your software, hardware, project type, and delivery needs. A film artist may need detailed control over every light. An architect may need fast previews and realistic interiors. A product designer may care more about accurate materials and clean images.
This guide explains the main choices and the trade-offs that matter before you commit.
What 3D Rendering and Ray Tracing Tools Actually Do
A 3D scene contains objects, cameras, lights, and materials. A renderer uses this information to create an image.
Ray tracing follows the paths of light through a scene. It helps calculate reflections, shadows, and other lighting effects. Path tracing takes this further by tracing many light paths to simulate indirect light.
These methods can create realistic results. But they also need computing power and careful setup.
Not every renderer works in the same way. Some use the CPU, some use the GPU, and some support both. Some focus on offline production, while others provide real-time views.
It helps to understand three broad approaches:
- Offline rendering: The engine spends more time calculating each frame. This suits detailed images, animation, and visual effects.
- Real-time rendering: The engine updates the scene quickly as you work. This helps with design reviews, interactive experiences, and virtual production.
- Hybrid rendering: The software combines different methods to balance image quality and speed.
The difference matters because a fast preview does not always match a final production render.
The Main Decision: Image Quality, Speed, or Workflow Control?
A renderer can produce impressive images and still be a poor fit. The real question is how it fits your daily work.
Consider these needs before choosing:
- Photorealistic images: Look for strong lighting, material, reflection, and global illumination tools.
- Animation and visual effects: Check support for motion blur, volumes, render passes, and pipeline integration.
- Architecture and interiors: Look for reliable material workflows, daylight tools, and useful scene previews.
- Product visualization: Check material accuracy, clean reflections, camera control, and output quality.
- Interactive design: Give more weight to viewport speed and real-time updates.
- Large scenes: Check memory use, scene handling, and multi-GPU support.
A renderer should also fit the 3D application you already use. Changing engines can affect materials, lights, shaders, and project files.
Rendering Software Worth Considering
These products serve different creative and technical needs. They are not interchangeable, so compare their workflows before comparing their images.
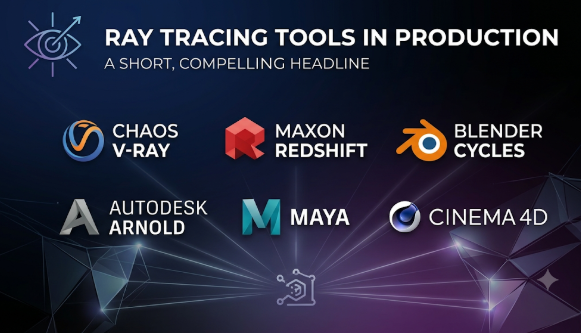
Blender Cycles: A Flexible Starting Point
Blender includes Cycles, a ray-tracing production engine. It supports path tracing, global illumination, reflections, and detailed materials.
Cycles can render through the CPU or supported GPUs. Its GPU options include NVIDIA CUDA and OptiX, AMD HIP, Intel oneAPI, and Apple Metal.
This flexibility makes Blender useful for artists with different hardware. It also avoids the need to buy a separate renderer for many projects.
Blender includes EEVEE as a real-time rendering option. This gives artists a faster way to preview scenes before final rendering.
The main advantage is its broad creative workflow. You can model, animate, shade, and render inside one application. However, complex scenes still need careful memory and render settings.
V-Ray: Detailed Control for Professional Visualization
V-Ray from Chaos is widely used for architectural visualization, product images, and visual effects.
It offers CPU and GPU rendering workflows. Artists can work with detailed materials, lighting, and advanced rendering controls.
V-Ray also connects with several established creative applications. The exact workflow depends on the host application and license.
Its strength is the level of control it gives experienced artists. This helps when clients need precise materials, lighting, and repeated revisions.
The trade-off is its learning curve. New users may need time to understand its many settings. They should also check the cost of the required license and related services.
Corona Renderer: A Practical Choice for Architectural Scenes
Corona Renderer focuses on photorealistic images for architecture and design.
Its workflow uses CPU rendering. This means your processor has a direct effect on rendering speed. A powerful graphics card can still help your main 3D application, but it does not replace the CPU renderer.
Corona offers LightMix, which lets artists adjust light intensity and color after a render. This can save time when testing different lighting ideas.
Its interface also aims to keep common tasks simple. Many default settings work well without deep manual tuning.
Corona works with 3ds Max and Cinema 4D. It is worth considering if your studio already uses either application.
Its main limitation is hardware specialization. Artists who want GPU-based final rendering should compare other engines.
Arnold: Production Rendering for Complex Scenes
Autodesk Arnold is a production renderer used in animation, visual effects, and design workflows.
It supports CPU and GPU rendering. Artists can switch between these modes while working on a scene.
Arnold includes tools for hair, fur, volumes, motion blur, and detailed materials. It also supports render passes and Cryptomatte for compositing work.
These features matter when a final image must fit into a larger production pipeline. Artists can separate parts of an image and adjust them later.
Arnold suits teams that need control over complex scenes. It may feel excessive for simple product images or basic architectural work.
Redshift: GPU Rendering With Production Controls
Maxon Redshift is a GPU-accelerated renderer built for production work.
It uses a biased rendering approach. This means artists can adjust selected rendering techniques to balance image quality and speed.
Redshift supports Cinema 4D, Maya, 3ds Max, Houdini, Blender, Katana, and ZBrush. Its exact features can depend on the host application and hardware.
Its interactive preview helps artists adjust lights, materials, and cameras. This can make repeated creative changes easier.
Redshift is useful for animation, motion design, and visual effects. But its GPU needs deserve careful attention. Check supported hardware and memory needs before buying a license.
OctaneRender: GPU-Based Path Tracing
OctaneRender from OTOY uses physically based path tracing.
It focuses on GPU rendering and supports features such as multiple GPUs, render passes, volumes, and denoising.
This approach can suit artists who want physically based lighting and detailed material effects. Its spectral rendering approach also gives artists control over how light interacts with materials.
Hardware support needs special attention. Octane’s supported GPU options differ by platform and release. Check the current requirements before choosing it.
A GPU-heavy workflow may not suit every studio. If your team uses mixed hardware, test compatibility first.
Unreal Engine: Real-Time and Offline Ray Tracing
Unreal Engine combines real-time rendering with ray-tracing features.
Its real-time approach uses ray tracing alongside traditional raster rendering. This helps keep interactive scenes responsive.
It also includes a Path Tracer for high-quality offline images. The engine can use this mode for detailed frames and visual comparisons.
Unreal Engine is useful for games, virtual production, interactive architecture, and digital experiences. It can also support high-quality visualization.
However, it is more than a standalone rendering tool. Teams must learn its scene system, materials, project setup, and asset workflow.
NVIDIA Omniverse RTX Renderer: For Connected 3D Workflows
NVIDIA Omniverse RTX Renderer supports real-time and interactive path-tracing modes.
It works with USD-based scenes and NVIDIA’s Material Definition Language. This makes it relevant to teams that share complex 3D data across connected tools.
Its real-time mode aims to provide fast visual feedback. Its interactive path-tracing mode favors higher image quality, with performance trade-offs.
The renderer supports multi-GPU rendering on suitable systems. But its hardware requirements matter. The documented RTX workflow is built around NVIDIA GPUs.
It is worth exploring for engineering, design, manufacturing, and visualization teams using Omniverse.
How These Rendering Tools Differ
The table highlights their main roles. It does not rank image quality or rendering speed.
| Tool | Main approach | Strong fit | Important consideration |
|---|---|---|---|
| Blender Cycles | CPU and GPU path tracing | General 3D creation | Scene setup and hardware tuning |
| V-Ray | CPU and GPU rendering | Architecture and product visualization | Learning curve and licensing |
| Corona | CPU rendering | Architectural visualization | CPU performance matters |
| Arnold | CPU and GPU rendering | Animation and visual effects | Production-focused workflow |
| Redshift | GPU-accelerated rendering | Motion design and VFX | GPU and memory requirements |
| OctaneRender | GPU path tracing | Photorealistic creative work | Check supported GPU hardware |
| Unreal Engine | Real-time ray tracing and path tracing | Interactive scenes and virtual production | Requires an engine-based workflow |
| Omniverse RTX | Real-time and path tracing | Connected 3D and engineering workflows | NVIDIA hardware and USD workflow |
Why GPU and CPU Choices Matter
Hardware can change the cost and speed of a rendering workflow. It can also limit which software you can use.
GPU Rendering
A graphics card can process many rendering tasks at once. This makes GPU rendering useful for scenes that suit parallel processing.
But GPU memory can become a limit. Large textures, detailed geometry, and complex effects all need space.
Before choosing a GPU renderer, check:
- Supported graphics card brands and models.
- Required graphics memory.
- Multi-GPU support.
- Driver and operating system needs.
- Denoising support.
- Whether the renderer can handle scenes larger than GPU memory.
Do not assume that adding more graphics cards always makes rendering faster. Software support and memory use can affect the result.
CPU Rendering
CPU rendering uses the computer’s main processor. It can be useful for workflows that depend on CPU-based engines.
Corona is a clear example. Its rendering process depends on CPU performance rather than GPU rendering power.
A strong CPU and enough system memory can help with complex scenes. But CPU rendering may not suit artists who need fast GPU previews.
Hybrid and Mixed Workflows
Some engines offer both CPU and GPU options. Others connect offline rendering with real-time previews.
This can give artists more choice. But the two modes may not produce identical results.
Test the same scene in both modes. Compare image quality, render time, memory use, and material behavior.
Ray Tracing, Path Tracing, and Real-Time Rendering
These terms often appear together, but they describe different things.
Ray tracing follows light rays through a scene. It helps calculate reflections, shadows, and other lighting effects.
Path tracing traces many possible light paths. It can produce realistic indirect lighting and material effects.
Real-time rendering aims to update images quickly as the scene changes. It often combines raster rendering with selected ray-traced effects.
The best method depends on the final output. A film frame may need detailed offline calculations. An interactive product demo needs quick feedback.
A useful workflow may use real-time rendering during design. It can then use path tracing for final images.
What to Check Before Choosing a Renderer
A product page may show impressive images. But those images do not tell you how the software will work on your computer.
Use these checks before committing.
1. Confirm Compatibility With Your 3D Application
Start with the software you already use.
Check whether the renderer supports your application. Then check which features work through that connection.
Some tools work as plugins. Others run as separate applications or engines.
A renderer with a strong feature set may still be a poor choice if it breaks your existing workflow.
2. Test Your Actual Hardware
Do not rely only on general hardware recommendations.
Use a scene that reflects your real work. Include large textures, detailed objects, lights, and materials.
Then check:
- How long the preview takes.
- How long the final image takes.
- How much memory the scene uses.
- Whether the software becomes unstable.
- How long changes take to appear.
This gives you more useful information than a simple hardware specification.
3. Check Material and Lighting Compatibility
A material may look different across renderers. The same applies to lights, cameras, and textures.
This can create extra work when moving a project between tools.
Check whether the renderer supports your current material system. Also test any special shaders or plugins your projects depend on.
4. Understand the Full Cost
A renderer’s license is only one part of its cost.
You may also need to pay for:
- A compatible graphics card.
- Extra system memory.
- Paid 3D application licenses.
- Cloud rendering services.
- Asset libraries.
- Training and support.
- Storage for large projects.
Free software can still have hardware and learning costs. Paid software can also save time when it fits an established studio workflow.
5. Check Team and Pipeline Needs
A solo artist has different needs from a large studio.
A team may need shared materials, consistent color settings, render passes, and reliable file exchange.
It may also need batch rendering and support for render farms. Check these needs before adopting a tool across a team.
6. Test the Final Output
A fast preview does not guarantee a clean final image.
Render a full-size image or a short animation. Check reflections, shadows, fine details, noise, and color.
If the work goes into video editing or compositing, test the output files too. Formats such as OpenEXR can preserve extra image data for later work.
Common Mistakes When Selecting 3D Rendering Software
A few mistakes can lead to wasted time and extra costs.
Choosing by sample images alone: A beautiful image does not prove that the software suits your workflow. Check the scene setup and hardware needs.
Ignoring GPU memory: A powerful GPU can still struggle with large scenes. Memory limits may force you to reduce textures or geometry.
Mixing up real-time and offline rendering: A real-time engine may suit interactive work. An offline renderer may offer more control for final frames.
Buying too many tools: You may not need several rendering engines. Start with one that supports your main projects.
Ignoring learning time: A powerful renderer can slow down a team if nobody knows how to use it well.
Skipping a full project test: A small sample scene may hide problems. Test a real project before changing your pipeline.
Which Rendering Approach Fits Your Work?
The right option depends on the work you produce.
- Students and independent artists: Start with Blender Cycles. It offers a broad workflow without a separate renderer purchase.
- Architectural artists: Compare V-Ray and Corona. Choose based on your preferred controls, hardware, and host application.
- Animation and visual effects teams: Evaluate Arnold and Redshift. Check how each fits your production pipeline.
- GPU-focused artists: Compare Redshift and OctaneRender. Confirm hardware support and memory needs first.
- Game and interactive teams: Explore Unreal Engine. Its real-time workflow suits interactive scenes.
- Engineering and connected design teams: Consider Omniverse RTX when USD and NVIDIA-based workflows fit your setup.
These are starting points, not universal rankings. A short test with your own scene is the best way to confirm a choice.
Questions Worth Asking Before a Purchase
Before paying for a renderer, ask the vendor or your technical team these questions:
- Does it support our main 3D application?
- Which graphics cards and processors does it support?
- How much memory do our usual scenes need?
- Can it render animation as well as still images?
- Does it support our materials and plugins?
- Can it export the render passes our team needs?
- Does the license cover our intended use?
- Can we test it with a real project before buying?
Also ask how the tool handles software updates. A change in the renderer may affect older projects and materials.
Make the Renderer Fit the Project
The best rendering engine is not always the one with the longest feature list. It is the one that supports your work without adding needless cost or complexity.
Start with your main 3D application and the scenes you create most often. Then compare hardware needs, image quality, workflow speed, and licensing.
Test at least one realistic project before making a long-term choice. That small step can reveal problems that product pages cannot show.





Leave a Reply
You must be logged in to post a comment.