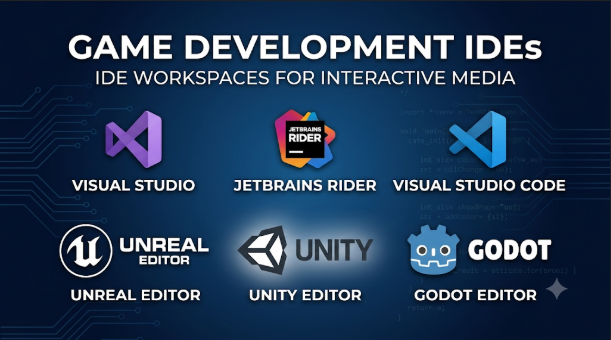
A game project can contain thousands of scripts, complex build files, shaders, and engine tools. The wrong coding environment can make simple changes slow and debugging painful.
Game development IDEs help developers manage this work. They provide code editing, navigation, error checks, debugging, and project management. Some also understand specific game engines and their internal systems.
But an IDE does not replace a game engine. Unity, Unreal Engine, and Godot handle scenes, assets, rendering, and gameplay systems. An IDE helps developers write and maintain the code behind those experiences.
That distinction changes how you should choose your tools. A Unity developer writing C# has different needs from an Unreal developer working with C++. A small team making a 2D game may need much less.
The strongest choice is not always the most feature-rich IDE. It is the one that fits your engine, programming language, build process, and team workflow.
What makes an IDE useful for game development?
A general code editor can open a game project and edit its scripts. A game-focused IDE goes further by understanding more of the project’s structure.
For example, an Unreal project may contain C++ classes, generated code, reflection macros, and Blueprint references. A Unity project may contain C# scripts, assemblies, serialized assets, and editor-specific APIs.
An IDE that understands these structures can make navigation and debugging easier.
Important capabilities include:
- Code completion: Suggests engine classes, methods, and programming language features.
- Code navigation: Helps developers find definitions, references, and related files.
- Debugging: Lets developers pause execution, inspect variables, and follow program flow.
- Refactoring: Helps rename classes, move methods, and change code safely.
- Build integration: Connects the IDE with compilers, build systems, and project files.
- Version control: Helps teams review and manage changes.
- Testing: Runs unit tests and supported engine tests.
- Shader support: Helps edit and inspect graphics code.
- Engine awareness: Understands engine-specific structures and workflows.
Not every developer needs every feature. A solo developer making a small 2D game may value quick editing and simple debugging. A large C++ project may need advanced navigation and build support.
Six IDEs worth considering for game development
These options serve different workflows. Some provide deep engine integration, while others offer flexible development environments.
1. JetBrains Rider: Engine-aware development across several game engines
JetBrains Rider is a full IDE with specific support for game development. It supports workflows involving Unity, Unreal Engine, Godot, and custom game technology.
Its main strength is that it understands more than ordinary source files. For Unreal projects, Rider can work with engine-specific code, reflection macros, generated files, and Blueprint-related references.
For Unity, it supports C# code navigation, debugging, inspections, and refactoring. Developers can attach its debugger to the Unity Editor or a running player.
Rider also supports testing workflows. Developers can work with common .NET test frameworks and supported Unity and Unreal test systems.
This makes it useful when a project has grown beyond a collection of scripts. Teams can inspect code, investigate errors, and refactor larger projects in one environment.
Where Rider makes sense: Unity teams that write substantial C# code, Unreal developers who want engine-aware C++ tools, and studios maintaining custom engines.
What to consider: Rider is a separate application from the game engine. Developers still need the correct compiler, SDKs, engine installation, and build tools. Some Unreal workflows on Windows also depend on Microsoft’s C++ toolchain.
Rider is free for non-commercial use under JetBrains’ licensing terms. Commercial projects require an appropriate commercial license.
Its game development documentation explains its engine-specific features.
2. Microsoft Visual Studio: A strong environment for C# and Unreal C++
Visual Studio is a full IDE with established game development support.
It is particularly relevant to developers using Unity and Unreal Engine. Its Unity tools help developers work with C# scripts, navigate projects, and debug game code.
For Unreal, Visual Studio provides C++ editing, IntelliSense, debugging, and support for engine-specific code. Developers can also inspect relationships between C++ classes and Blueprints.
Its debugger is useful when a problem appears only during gameplay. A developer can pause execution, inspect values, and trace the code path behind an unexpected result.
Visual Studio also supports development with frameworks such as MonoGame.
Where it stands out: It is a natural option for Windows-based Unreal C++ development. It also suits Unity developers who prefer a full IDE with integrated debugging.
What to consider: Visual Studio is not available on every desktop operating system. Teams using macOS or Linux need another development environment for their regular work. Unreal C++ projects on Windows also require a compatible Microsoft build toolchain.
Visual Studio Community is free for eligible individuals, education, open-source work, and qualifying organizations. Larger organizations must review Microsoft’s licensing conditions before using it.
Read the Visual Studio game development documentation for engine setup and workflow guidance.
3. Visual Studio Code: A flexible editor that becomes an IDE through extensions
Visual Studio Code is a lightweight, extensible code editor. It is not as fully integrated out of the box as Visual Studio or Rider.
Its strength comes from extensions and external development tools. Developers can add language support, debugging, project navigation, and build integration as needed.
For Unity, Microsoft provides a Unity extension that works with C# support and the C# Dev Kit. It adds Unity-specific debugging, code analysis, and editor features.
For Godot, developers can connect VS Code through the official Godot tools extension. Godot provides language-server and debugger support for compatible external editors.
VS Code also supports C and C++ through Microsoft’s extension. However, developers must install their own compiler and debugger. The extension does not provide a complete C++ toolchain.
Where it stands out: It offers a flexible environment for developers who work across several languages or prefer a configurable editor.
What to consider: Setting it up can take time. Extensions, compiler paths, project files, and debugging configurations must work together. Some advanced engine features may be easier to access in a dedicated IDE.
For a small project, this flexibility may be an advantage. For a large Unreal C++ codebase, a more engine-aware IDE may reduce setup and navigation work.
Useful starting points include Microsoft’s Unity development guide for VS Code, its C++ documentation, and the Godot VS Code plugin.
4. JetBrains CLion: A focused environment for native C and C++
CLion is a C and C++ IDE designed around native development workflows.
It supports common build systems such as CMake, Makefiles, Meson, and compilation databases. It also provides code navigation, refactoring, debugging, and project analysis.
This makes CLion relevant to developers building custom game engines, native game frameworks, rendering systems, and supporting tools.
A studio creating its own engine may have a large C++ codebase outside Unity or Unreal. CLion can help manage that code through its project model and native development features.
It can also work with C++ projects that use common build formats. However, it does not provide the same dedicated game-engine integrations as Rider.
Where it stands out: CLion suits native C++ work where build configuration and code analysis matter more than engine-specific features.
What to consider: It is not a complete game development environment. Developers still need a game engine or framework, graphics libraries, compilers, and other dependencies.
CLion is also a paid product for commercial use, with non-commercial licensing available under JetBrains’ terms.
Its CMake project documentation explains how it handles native projects and build systems.
5. Xcode: The central development environment for Apple games
Xcode is Apple’s integrated development environment for building software across its platforms.
It is especially important for developers creating native games for iPhone, iPad, Mac, Apple TV, and other supported Apple devices.
Xcode includes source editing, debugging, simulators, project management, and performance tools. It also connects with Apple’s graphics and game frameworks.
For example, developers can use Metal for graphics programming. SpriteKit provides a framework for 2D games, while GameplayKit offers systems for game logic and behavior.
Xcode is also relevant when a game engine exports a project for an Apple platform. Developers may need it to manage native project files, build settings, signing, and packaging.
Where it stands out: It provides the development tools and platform integration needed for native Apple software.
What to consider: Xcode is tied to Apple’s ecosystem and requires macOS. It is not a general replacement for Unity or Unreal. Developers targeting several platforms may still use another IDE for their main game code.
Apple’s game technology documentation explains how its development tools and frameworks fit together.
6. Android Studio: Native development for Android games
Android Studio is Google’s official IDE for Android application development. It also supports native game development with C and C++ through the Android Native Development Kit.
Developers can use its project tools and CMake support to organize native code. Its Gradle build system helps manage Android project builds.
This makes Android Studio useful for teams creating native Android games or maintaining the Android-specific parts of a game.
It is not the main coding environment for every Android game. Developers using Unity or Unreal often spend most of their time in the engine and a separate code IDE.
Android Studio becomes more important when the project needs direct access to native Android code or platform-specific services.
Where it stands out: It provides Android-focused build and development tools for native projects.
What to consider: It is not a full game engine. Developers must supply the rendering, gameplay, and other game systems through a framework, engine, or custom code.
Google’s Android game development documentation explains how Android Studio fits into native game projects.
How these IDEs differ in practice
The right comparison depends on the engine and programming language.
| IDE | Strongest game development fit | Main languages or workflows | Important limitation |
|---|---|---|---|
| JetBrains Rider | Unity, Unreal, Godot, custom engines | C#, C++, engine-aware tooling | Commercial license for commercial use |
| Visual Studio | Unity and Unreal on Windows | C#, C++, Microsoft toolchain | Desktop IDE is not cross-platform |
| Visual Studio Code | Flexible engine and framework workflows | C#, C++, extensions | Needs extra setup and tools |
| JetBrains CLion | Custom engines and native development | C and C++ | Less dedicated engine integration |
| Xcode | Native Apple games | Swift, Objective-C, C++, Metal | Requires macOS and targets Apple platforms |
| Android Studio | Native Android games | Kotlin, Java, C++, NDK | Not a general-purpose game engine |
This table compares development environments, not game engines. The IDE alone does not determine a game’s graphics quality, frame rate, or supported platforms.
Your game engine often determines the IDE shortlist
The most important decision is usually the engine already used by the project.
Different engines have different scripting languages, build systems, project files, and debugging needs. Choosing an IDE that understands those details can save time.
If you develop with Unity
Unity uses C# for much of its gameplay scripting. Its documentation supports Visual Studio, Visual Studio Code, and Rider for script editing and debugging.
- Choose Rider for deeper C# analysis and refactoring.
- Choose Visual Studio for a full IDE and integrated debugging on supported systems.
- Choose VS Code for a lighter, extension-based workflow.
Unity’s IDE support documentation explains the setup requirements.
One detail deserves attention: Unity’s Visual Studio Editor package supports both Visual Studio and VS Code. The older Visual Studio Code Editor package is no longer supported.
If you develop with Unreal Engine
Unreal uses C++ alongside its visual scripting system, Blueprints.
This creates a different IDE requirement. Developers who write C++ need a suitable compiler, build tools, and debugging support.
- Choose Visual Studio for a closely integrated Windows C++ workflow.
- Choose Rider for engine-aware navigation and C++ development.
- Consider VS Code for a configurable workflow if your team can manage the build and debugger setup.
A Blueprint-only project may not need a separate C++ IDE for everyday work. However, native C++ development and packaging can introduce additional toolchain requirements.
If you develop with Godot
Godot includes its own editor and script editor. Developers can write GDScript directly inside the engine.
That built-in workflow may be enough for many small and medium projects.
Developers who prefer an external environment can use VS Code, Rider, or other supported editors. Godot provides language-server and debugger support for compatible external tools.
For C# projects, the required .NET setup and editor configuration deserve separate attention.
See the Godot external editor documentation before changing your workflow.
If you build a custom C++ engine
A custom engine often needs more than gameplay scripting.
The project may include rendering code, physics systems, asset importers, platform layers, and build tools. The IDE must understand the project’s build configuration.
CLion is worth considering for CMake-based native projects. Rider may suit game-focused C++ workflows. Visual Studio is another strong choice for Windows development.
VS Code can also work, but the team must configure compilers, debuggers, and project support.
IDE or built-in engine editor: Which one do you need?
Not every game development environment requires a separate IDE.
Some engines include their own code editor and project tools. Others rely on external applications for serious coding and debugging.
| Development environment | How coding is handled |
|---|---|
| Unity | Commonly uses an external C# IDE |
| Unreal Engine | Includes editor tools and Blueprints; C++ work commonly uses an external IDE |
| Godot | Includes a script editor and supports external editors |
| GameMaker | Includes an integrated development environment and code editor |
| Construct | Uses a visual event-based editor rather than a traditional code-first IDE |
This distinction matters for beginners.
A person making a small game in GameMaker may not need Rider or Visual Studio. A developer building a large Unreal C++ project will likely benefit from a dedicated IDE.
Do not add another tool simply because professional studios use it. Add one when it solves a real problem in the current workflow.
What should you evaluate before choosing?
Feature lists rarely reveal how well an IDE fits a real game project. A short practical evaluation is more useful.
1. Check language and engine support
Start with the languages used by the project.
C# support does not automatically mean strong Unity support. C++ support does not automatically mean good Unreal integration.
Look for engine-specific features such as Blueprint references, Unity debugging, GDScript language support, or shader editing.
2. Test debugging with a real gameplay problem
Set a breakpoint in a script or native class. Run the game and check whether the IDE can inspect the values you need.
For example, imagine a character sometimes stops moving after entering a certain area. You may need to inspect input values, collision results, and the character’s current state.
A useful debugger should help you follow that problem without excessive manual setup.
3. Examine build and project integration
An IDE may edit code well but still require external build tools.
Check whether it understands your project’s build system. Confirm that it can locate the right compiler, SDK, and generated files.
For Unreal C++, this means checking the Microsoft toolchain on Windows or the relevant platform toolchain elsewhere.
For a custom engine, confirm that the IDE can load the project’s CMake files or compilation database.
4. Consider project size
A small game may contain only a few scripts. A large project may have many modules, generated files, and dependencies.
Test code navigation on a representative project. Check how the IDE handles indexing, search, and large source files.
Do not rely only on claims about speed. Your actual project structure and computer hardware will affect the experience.
5. Review team workflows
A studio may need more than code editing.
Consider:
- Git or Perforce support.
- Code review and merge workflows.
- Shared formatting rules.
- Build automation.
- Test integration.
- Remote development.
- License requirements for each developer.
An IDE that works well for one developer may create friction across a team if its setup is hard to share.
6. Check the full cost
Some tools are free, while others offer paid commercial plans or restricted free licenses.
But the IDE price is only one part of the cost.
Consider the time needed to configure extensions, maintain build tools, train developers, and resolve project-specific issues.
A free editor that needs extensive setup may cost more in developer time than a paid IDE that fits the project.
Common mistakes when selecting a game development IDE
A few assumptions can lead to unnecessary changes or extra work.
Confusing an IDE with a game engine. An IDE helps write and debug code. It does not automatically provide rendering, physics, scenes, or asset management.
Choosing based on popularity alone. A tool used by a large studio may be excessive for a small project. Fit matters more than reputation.
Ignoring compiler requirements. An IDE may support C++ editing but not include the compiler or SDK needed to build the game.
Installing too many extensions. More extensions do not always improve the workflow. They can create conflicts and add maintenance work.
Ignoring engine-specific debugging. General debugging may not provide enough information about Blueprints, Unity objects, or engine-generated code.
Switching tools too early. A new IDE may introduce setup work without fixing the actual problem. Identify the missing feature first.
A practical way to make the final choice
Use the project’s engine and main programming language to narrow the options.
- Unity with substantial C# development: Compare Rider, Visual Studio, and VS Code.
- Unreal with C++: Compare Rider and Visual Studio, then check the required build toolchain.
- Godot with GDScript: Start with the built-in editor before adding another IDE.
- Custom C++ engine: Evaluate CLion, Rider, Visual Studio, and VS Code against the build system.
- Native Apple game: Start with Xcode and the relevant Apple frameworks.
- Native Android game: Start with Android Studio and the required NDK or framework.
Then run a small pilot with real project files. Open the project, build it, debug a gameplay issue, and make a safe code change.
That test reveals more than a feature checklist. It shows whether the IDE fits the actual development process.
The best game development IDE is the one that removes friction from the work your team does every day. Start with engine compatibility, test debugging and builds, and only pay for advanced features when they solve a clear problem.





Leave a Reply
You must be logged in to post a comment.