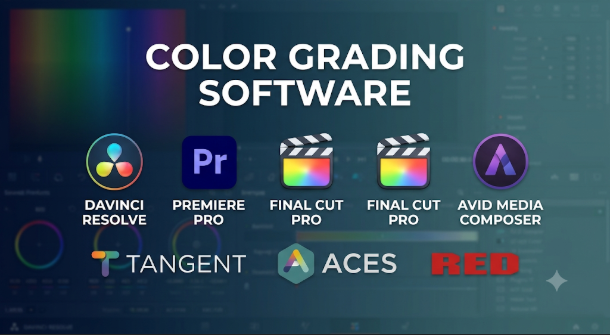
Color grading can change how an entire video feels. A bright scene can look warm and welcoming. The same scene can feel cold, tense, or dramatic with different colors.
But getting that look takes more than adding a filter. Editors must balance exposure, control skin tones, match camera footage, and keep colors consistent across scenes.
The right software makes these tasks easier. It also helps editors build repeatable workflows without damaging the original footage.
The challenge is that color grading tools serve different needs. Some focus on professional film production. Others suit independent filmmakers, social media creators, and small editing teams. A few offer powerful color controls without requiring a separate application.
The best choice depends on your footage, editing workflow, hardware, and level of control. Understanding these differences matters more than choosing software with the longest feature list.
What color grading software actually does
Color grading software gives editors control over the appearance of video footage. It helps correct technical problems and create a consistent visual style.
Two related tasks make up most color work.
Color correction: Make the footage look right
Color correction fixes problems caused by lighting, cameras, and recording conditions.
Common adjustments include:
- White balance: Removes unwanted blue, green, or orange color casts.
- Exposure: Makes footage brighter or darker.
- Contrast: Controls the difference between light and dark areas.
- Saturation: Adjusts the strength of visible colors.
- Shot matching: Makes different camera shots look consistent.
- Skin tones: Helps keep faces looking natural.
For example, imagine a scene recorded with two cameras. One camera produces a warmer image. The other looks cooler.
Color correction helps bring both images closer together.
Creative grading: Give the footage a visual identity
Creative grading shapes the mood of a scene.
A filmmaker might use cooler shadows for a tense scene. They might use warmer highlights for a sunset. A music video might use strong colors for a bold visual style.
Grading tools also help create a consistent look across an entire project.
The important distinction is that correction fixes image problems. Grading creates an intentional appearance. Professional workflows often use both.
The technical decisions that matter before choosing software
A grading application can offer hundreds of controls. But a few technical differences have a much greater effect on your workflow.
1. Color spaces and camera footage
Different cameras record color in different ways. Many professional cameras use log profiles or RAW formats.
Log footage stores a wide range of image information. However, it often looks flat before proper color transformation.
RAW footage can provide additional control over image interpretation. The exact options depend on the camera format and software support.
Look for support for the camera formats you actually use. Also check how the application handles input color spaces and output transforms.
2. Node-based versus layer-based grading
🎨 Color Grading a TV Commercial – A Behind the Scenes Masterclass
How to Use Premiere Pro’s Adjustment Layers: Step-by-Step Tutorial
Colour Grading Masterclass : Davinci Resolve
Node-based grading connects individual adjustments into a visual processing chain.
For example, one node can handle exposure. Another can control skin tones. A third can apply a creative look.
This approach makes complex grades easier to organize and change.
Layer-based workflows stack adjustments in a more familiar order. They can feel easier for editors who already work with video effects and tracks.
Neither approach is automatically better. The right choice depends on how complex your projects become.
3. Scopes and accurate monitoring
A computer screen does not always show accurate colors. Display settings, brightness, and color profiles can change the image.
Professional grading software includes measurement tools called scopes.
The most useful ones include:
- Waveform: Shows image brightness levels.
- Vectorscope: Shows color distribution and saturation.
- RGB parade: Displays red, green, and blue channel levels.
- Histogram: Shows the distribution of image brightness.
These tools help editors make decisions based on image data rather than appearance alone.
For serious work, consider a calibrated reference display and a suitable video output device. Software cannot correct an inaccurate monitoring setup by itself.
4. SDR and HDR delivery
SDR and HDR use different brightness and color capabilities.
Rec. 709 is a common color standard for traditional HD video. HDR workflows may use formats such as HDR10 or HLG.
Some projects also require Dolby Vision metadata.
Before buying software, check the complete delivery chain. Your grading application, monitoring equipment, export settings, and final playback platform must work together.
Color grading software worth considering
The following applications represent different approaches to color work. Some offer dedicated grading environments. Others keep color controls inside a complete video editor.
They are not interchangeable. Their differences become important when projects involve multiple cameras, complex grades, HDR delivery, or professional finishing.
1. DaVinci Resolve: A complete environment for serious color work
The American Society of Cinematographers | Blackmagic Design Rolls…
DaVinci Resolve is a strong starting point for anyone who wants dedicated color grading tools without buying a separate grading application.
Its Color page provides a node-based workflow. Editors can separate exposure, contrast, color balance, masks, and creative effects into individual operations.
This makes it useful for both simple corrections and complex grades.
Its major strengths include:
- Primary and secondary color correction.
- Node-based grading with reusable adjustments.
- Power Windows for selective image corrections.
- Tracking for following moving objects.
- Curves, qualifiers, and color warping.
- Color management and ACES support.
- HDR grading and professional video scopes.
- Grade galleries for saving and reusing looks.
Resolve also includes editing, visual effects, audio post-production, and delivery tools. This reduces the need to move between several applications.
Where it stands out: Its dedicated grading environment makes it suitable for independent filmmakers, commercial editors, and professional colorists.
What to consider: The node system takes time to learn. Complex projects also need suitable graphics hardware, fast storage, and enough memory.
Blackmagic Design offers a free edition and a paid Studio edition. The free version provides substantial grading functionality. Some advanced tools and professional features require Studio.
2. FilmLight Baselight: Specialized grading for demanding productions
Baselight 6.0 Adds New Colour Space, AL/ML Tools, Look Dev for Colourists
FilmLight Baselight focuses on high-end color grading and finishing.
It serves colorists working on films, television, commercials, and complex post-production projects.
One important difference is its layer-based grading architecture. This gives colorists detailed control over image adjustments and complex creative operations.
Baselight also provides advanced tools for selective color work, tracking, mattes, and look development.
Its newer workflows include tools for handling large numbers of mattes and matching image transformations between editorial and finishing.
Another advantage is its wider product ecosystem. FilmLight offers Baselight for macOS and integrations for applications such as Avid Media Composer and Foundry Nuke.
This matters when a production needs specialist grading without abandoning its existing editing or visual effects workflow.
Where it stands out: Complex productions that need detailed color control, specialist finishing, and established post-production pipelines.
What to consider: Baselight requires more training and planning than a basic editing application. Licensing, hardware, and workflow requirements also deserve careful review.
FilmLight provides different licensing options, including trials and learning-focused products. Baselight LOOK is a separate Mac-only learning option with certain restrictions.
3. Adobe Premiere Pro: Color correction inside an editing workflow
9 Adobe Premiere Pro Plugins for creative teams
Adobe Premiere Pro suits editors who want to handle color adjustments without moving their entire project into another application.
Its traditional Lumetri tools provide color wheels, curves, exposure adjustments, and scopes. These help editors correct footage and develop creative looks within an editing timeline.
However, Adobe has changed its color workflow. Premiere’s newer Color Mode introduces a dedicated environment and color management controls.
The traditional Lumetri Color panel has been retired in the newer interface. Existing Lumetri effects remain editable through the Properties panel.
This distinction matters when following older tutorials or moving existing projects into a newer installation.
Premiere is particularly useful for:
- Editors working with long timelines.
- Productions using other Adobe applications.
- Marketing and corporate video teams.
- Social media and online video creators.
- Projects requiring frequent editing and grading changes.
Its integration with the wider Adobe ecosystem can reduce unnecessary file transfers.
Where it stands out: Editors who prioritize timeline editing and want substantial color controls in the same application.
What to consider: Dedicated grading specialists may prefer Resolve or Baselight for complex finishing. Premiere also uses a subscription licensing model.
4. Final Cut Pro: A focused grading workflow for Mac editors
Manual color correction workflow in Final Cut Pro for Mac – Apple Support (NG)
Final Cut Pro combines video editing with practical color correction tools.
Its Color inspector includes several ways to adjust footage. These include color wheels, color curves, hue and saturation curves, and color adjustments.
Editors can work on individual clips without leaving the timeline.
Its color wheels provide separate controls for global color, shadows, midtones, and highlights. This makes common balancing tasks easier to understand.
Final Cut Pro also supports LUT-based workflows and color matching tools.
Its magnetic timeline and Apple hardware integration make it attractive to Mac-based editors.
Where it stands out: Independent filmmakers, video creators, and production teams already working on Mac computers.
What to consider: Final Cut Pro is tied to Apple’s platform. Teams using Windows workstations need another option. Editors handling complex finishing may also want a dedicated grading environment.
5. VEGAS Pro: Flexible color tools for timeline-focused editors
Video scopes: Waveform, Vectorscope & Histogram for accurate color grading
VEGAS Pro combines video editing with a broad set of color adjustment tools.
Its grading environment includes lift, gamma, and gain wheels, RGB and HSL curves, LUT support, and video scopes.
It also supports log footage and color-managed workflows.
These capabilities make it useful for editors who want more control than simple filters provide.
VEGAS Pro also appeals to users who prefer working directly on a timeline rather than building a separate finishing workflow.
Where it stands out: Independent editors who want integrated editing and detailed color adjustments.
What to consider: Buyers should check their camera formats, operating system, and required color-management features before choosing a plan. Its workflow may not suit every specialist post-production pipeline.
6. Assimilate SCRATCH: Grading and finishing beyond ordinary editing
Assimilate’s Scratch v9 is a very powerful and user friendly dailies and colour grading suite
Assimilate SCRATCH combines grading with several production and finishing tasks.
It supports primary color correction, CDL controls, curves, masks, tracking, LUTs, and advanced compositing.
One important distinction is its focus on demanding finishing workflows. It also supports immersive media, including 180-degree and 360-degree projects.
SCRATCH includes tools for dailies, media preparation, mastering, and delivery. These capabilities can be useful when teams need more than ordinary timeline editing.
Its color management features include ACES and OpenColorIO support.
Where it stands out: Post-production teams handling specialized finishing, complex media formats, and immersive video.
What to consider: Its broader workflow may be excessive for simple YouTube videos or basic social media projects. Buyers should also evaluate its licensing and hardware requirements.
How these applications differ
| Software | Main strength | Workflow approach | Suitable environment |
|---|---|---|---|
| DaVinci Resolve | Dedicated color grading | Node-based | Independent and professional post-production |
| FilmLight Baselight | Advanced finishing | Layer-based | Film and television facilities |
| Adobe Premiere Pro | Editing with color tools | Timeline and effects | Adobe-based editing teams |
| Final Cut Pro | Integrated Mac editing and grading | Timeline and color inspector | Mac-based creators |
| VEGAS Pro | Flexible timeline grading | Integrated color panel | Independent video editors |
| Assimilate SCRATCH | Grading and finishing | Layer and node-based tools | Specialist post-production |
The main distinction is not simply the number of color controls.
Resolve and Baselight offer dedicated grading environments. Premiere, Final Cut Pro, and VEGAS Pro integrate color work into editing. SCRATCH combines grading with wider finishing tasks.
That difference should guide your shortlist.
Free software versus paid grading applications
A paid license does not automatically produce better-looking footage.
The result depends on the source material, color management, monitoring, and the editor’s skill.
Free software can handle serious work when its capabilities match the project.
When free software makes sense
DaVinci Resolve’s free edition is a practical starting point.
It provides a substantial grading environment without requiring an initial software purchase.
It suits learners, independent creators, and editors who need professional-style controls.
FilmLight also offers Baselight LOOK as a learning-focused product. It provides access to core Baselight features but has restrictions.
When paid software becomes worthwhile
A paid application may make sense when a project needs specific advanced features.
For example, an editor may need advanced noise reduction, specialized HDR tools, or particular finishing capabilities.
Other reasons include:
- Access to specialist workflow tools.
- Required integrations with existing production software.
- Team licensing and support arrangements.
- Advanced delivery and mastering requirements.
- Features restricted to commercial editions.
Compare the exact feature requirements before paying.
A useful approach is to identify one feature that your current software cannot handle. Then check whether another application solves that specific problem.
How to choose software for your actual workflow
Instead of comparing every feature, start with the work you need to complete.
| Your situation | A sensible starting point | Why |
|---|---|---|
| Learning color grading | DaVinci Resolve Free | Extensive grading tools without an initial purchase |
| Making cinematic short films | DaVinci Resolve | Dedicated color workspace and node controls |
| Editing client videos | Adobe Premiere Pro | Editing and grading in one workflow |
| Working on a Mac | Final Cut Pro | Integrated editing and color correction |
| Working on complex film projects | FilmLight Baselight | Specialist grading and finishing |
| Handling mixed creative projects | VEGAS Pro | Integrated editing and color controls |
| Managing specialist finishing | Assimilate SCRATCH | Grading, compositing, and mastering |
These are practical starting points, not universal rankings.
Consider your camera before choosing software
Camera compatibility can affect your entire grading workflow.
For example, footage from a cinema camera may use a log profile. A smartphone may use a different color profile. A second camera may record in RAW.
Your software must interpret these sources correctly.
Before choosing an application, check:
- Does it support your camera’s recording format?
- Can it interpret your log footage correctly?
- Does it support your required input color space?
- Can it handle your intended output format?
- Can it match footage from different cameras?
Do not assume that importing a video file means the software interprets its colors correctly.
Check your computer’s hardware
Color grading can place heavy demands on your computer.
Large video files, noise reduction, high-resolution timelines, and complex effects can affect playback.
Pay attention to these components:
- Processor: Helps handle decoding and general editing tasks.
- Graphics card: Can accelerate image processing and demanding effects.
- RAM: Helps manage large projects and multiple applications.
- Storage: Fast SSD storage helps with media access and caching.
- Display: A suitable monitor helps you judge color and brightness.
Check the software’s official hardware requirements before purchasing.
You should also test your own footage. A short project can reveal performance problems before you commit to a complete production workflow.
A practical color grading workflow
Good software cannot replace a clear grading process.
A repeatable workflow helps prevent unnecessary adjustments and inconsistent results.
Learn to Use Your Scopes! – Easy Colour Correction
How to use qualifiers for secondary color correction in DaVinci Resolve
OW Cinema Looks – offwhitecolor
10
Step 1: Organize and inspect your footage
Import the original camera files.
Check their recording formats, frame rates, and color profiles. Group clips from the same camera or scene.
This makes later corrections easier.
Step 2: Set up color management
Choose the correct input color space for your footage.
Set an appropriate working color space and output target.
For example, a standard web video project may use a Rec. 709 delivery workflow.
A project intended for HDR needs a suitable HDR pipeline instead.
Incorrect settings can produce unexpected contrast and color shifts.
Step 3: Fix exposure and white balance
Start by correcting basic image problems.
Adjust brightness and contrast. Remove unwanted color casts. Check important details in highlights and shadows.
Use scopes to support your visual judgment.
Avoid making an image look dramatic before fixing its basic problems.
Step 4: Match shots from the same scene
Compare clips that belong together.
Check their brightness, contrast, saturation, and skin tones.
Use reference frames where possible.
This step matters when several cameras record the same event.
Step 5: Create the creative look
Now apply the desired visual style.
You might create warmer highlights, cooler shadows, or a softer contrast curve.
Use selective adjustments when necessary.
Avoid pushing every color too far. A strong look should still support the scene.
Step 6: Review the complete timeline
Watch the full sequence.
Look for sudden changes between shots. Check faces, bright areas, dark details, and important colors.
A grade that looks attractive on one frame may look inconsistent across several scenes.
Step 7: Export and check the final video
Choose the correct output color space and delivery format.
Review the exported file separately from your editing timeline.
Check it on another suitable display or playback device.
This helps catch problems caused by incorrect export settings or color handling.
Common color grading mistakes that waste time
Even powerful applications cannot prevent poor grading decisions.
These mistakes often cause more problems than the choice of software itself.
Applying creative LUTs without understanding them
A LUT is a preset color transformation.
It can help convert camera footage or create a particular visual style.
However, not every LUT suits every camera or exposure level.
A creative LUT applied to incorrectly prepared log footage can produce unnatural contrast and saturation.
Use the correct technical transformation first.
Grading only by looking at the screen
A bright monitor can make dark footage look better than it really is.
A display with incorrect color settings can also hide unwanted color casts.
Use video scopes and suitable monitoring equipment.
Over-saturating skin tones
Strong saturation can make faces look unnatural.
Pay attention to skin tones while adjusting other colors.
Use selective corrections when a global adjustment damages important parts of the image.
Using too many adjustments
Adding more nodes, layers, or effects does not always improve an image.
Each adjustment should solve a clear problem or create a deliberate visual result.
Keep the workflow organized.
Ignoring the final delivery format
A video graded for HDR may not look correct when converted to SDR without proper color management.
The same applies when delivering footage for broadcast, cinema, or online platforms.
Always check the destination before grading.
What about cloud-based and open-source alternatives?
Color grading does not always require a large dedicated workstation.
However, not every application described as a video editor or creative tool provides a complete professional grading environment.
It is important to distinguish between specialist grading software and complementary tools.
OpenColorIO (OCIO) is an open-source color management framework. It helps applications use consistent color transformations across production pipelines.
It is not a standalone color grading application.
Natron is an open-source node-based compositing application. It can support image-processing and visual effects workflows, but it should not be treated as a direct replacement for a complete professional grading system.
Colorfront Transkoder is another important adjacent product. It focuses on mastering, media processing, HDR conversion, and delivery. It is not a direct substitute for a dedicated creative grading application.
These distinctions matter when comparing software. A production may use several complementary applications rather than one product for every task.
Questions to ask before purchasing
A software demonstration should answer practical questions, not just show attractive sample footage.
Use these questions when comparing vendors:
- Can the software handle our actual camera formats?
- Does it support the color spaces used in our projects?
- Can we move projects between our editing and finishing applications?
- Does it support the HDR or SDR delivery formats we need?
- Can we use our existing grading control panels?
- Which features require additional licenses?
- Does the software support our operating systems and hardware?
- Can multiple editors or colorists work within our production workflow?
- What are the storage, graphics, and monitoring requirements?
- Can we test a complete project before purchasing?
A short trial using real project footage is more useful than a long demonstration using prepared sample videos.
Frequently asked questions
Is DaVinci Resolve good for beginners?
Yes. Its free edition offers a substantial range of color grading tools.
Beginners can start with exposure, white balance, contrast, and saturation. They can learn node-based grading as their skills improve.
Is color correction different from color grading?
Yes. Color correction fixes image problems, such as incorrect exposure and white balance.
Color grading creates a visual style. Both processes usually work together.
Can I grade videos without a professional monitor?
Yes. You can learn and perform basic grading on a suitable computer display.
However, professional work benefits from calibrated monitoring. Accurate displays help prevent unwanted color and brightness differences.
Are LUTs enough for professional color grading?
No. LUTs can speed up certain tasks, but they cannot replace careful correction.
Footage still needs proper exposure, white balance, color management, and shot matching.
Do I need a separate grading application?
Not always.
Premiere Pro, Final Cut Pro, and VEGAS Pro offer integrated color tools. They may be enough for many editing projects.
A dedicated application becomes more useful when you need advanced grading, complex shot matching, or specialist finishing.
Can different cameras use the same color grade?
Sometimes, but the result depends on the camera profiles and footage.
Different cameras may capture colors and exposure differently. Correct and match the footage before applying a shared creative look.
The right grading software starts with the footage
Choosing color grading software is less about finding the application with the most controls. It is about finding one that fits your production needs.
For independent creators and filmmakers, DaVinci Resolve offers a practical route into serious color work. Editors who already use Adobe or Apple applications may prefer to keep grading inside their existing workflow.
FilmLight Baselight serves a more specialized finishing environment. Assimilate SCRATCH addresses broader grading and mastering needs.
Before committing to a purchase, test your own camera footage. Check the export quality, hardware demands, and color management workflow.
Most importantly, learn to balance an image before trying to make it cinematic. Good color work starts with consistency, accuracy, and a clear creative purpose.



Leave a Reply
You must be logged in to post a comment.